Automating Shameless Plugs
I still feel weird tweeting things
This is a weird time to be building and publishing content. While it feels like a space that's becoming continually more crowded, there's plenty of valid reasons for deliberately sharing and promoting content that can help others. And, it's a big world. It can be a double-edged sword wherein one feels like a shameless self-promoter throwing content out only to bring attention to their own little corner of the internet. For me, this feeling always becomes magnified whenever I take to Twitter to share something new. I wouldn't say I avoid it, but I definitely hesitate to pop the app open and bust out the metaphorical bullhorn to let my meager number of followers know what the newest content I've published is all about.
Arguably, this automation is a way to gently avoid the dauntingly narcissistic act of tweeting a self-promotion and, instead, letting an api do it for me.
Implementation
I wanted to give this profile a little more than a fresh coat of paint. So, over the weekend, I rebuilt the Gatsby site that contained all my blog posts as .md files into a Nextjs application with GraphCMS as a headless CMS. One of the motivations was to quicken my workflow: instead of writing the post as a .md file, committing and pushing, letting the rebuild happen, then tweeting about it...I hoped there could be a much quicker more automated workflow. The result? Now, when I hit "publish" on a post, a build hook on Vercel rebuilds my site while another webhook hits an api route on my application to send a tweet for me. Self-removed self-promotion!
The Process
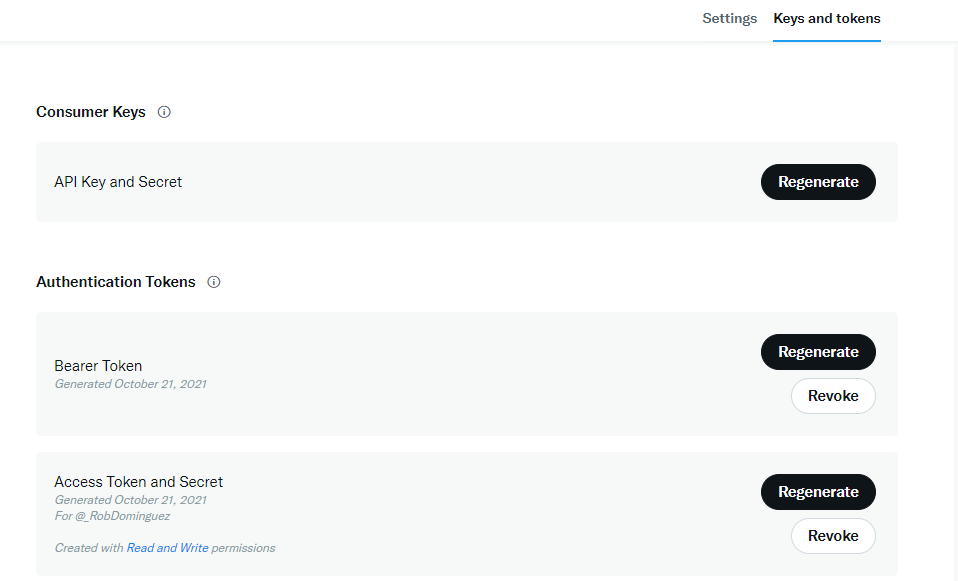
This is a fairly straightforward set up that doesn't involve too much code. First thing's first, head over to developer.twitter.com and get set up with an account. There's a number of questions to answer and rhetoric to provide, but it's a fairly painless process. Once your account has been verified, create an app and answer the questions that go along with creating it. At the end of the creation process, you'll be presented with a series of keys/tokens; copy these down for use in just a bit.
Next, you'll need to enable your app's read/write access (read-only by default).
If you missed any of the keys/tokens from the previous step, you can access them via this button at the top of the dashboard. We care about the Consumer Keys and Access Token and Secret sections. In just a minute, we're going to make an .env.local file in our repository; these values will get stored in this file.
In your project's root directory, create a .env.local file like the one below:
TWITTER_API_KEY=xxxxxxxxxxxxxxxxxxxxxxxxxxxxxxxxxxxxxxx,
TWITTER_API_SECRET_KEY=xxxxxxxxxxxxxxxxxxxxxxxxxxxxxxxxxxxxxxx,
TWITTER_ACCESS_TOKEN=xxxxxxxxxxxxxxxxxxxxxxxxxxxxxxxxxxxxxxx,
TWITTER_ACCESS_TOKEN_SECRET=xxxxxxxxxxxxxxxxxxxxxxxxxxxxxxxxxxxxxxx,
Store your associated values from your Twitter's Developer dashboard. For production builds - like on Vercel - you'll need to store these values as environment variables there, too.
We'll be using a package called twitter-lite to do the heavy lifting. You can install it by running npm i --save twitter-lite in the root directory of your project.
Next in the ./pages/api directory, create a file called tweetGenerator.js
// ./pages/api tweetGenerator.js

const twitter = require("twitter-lite");
const client = new twitter({
  consumer_key: process.env.TWITTER_API_KEY,
  consumer_secret: process.env.TWITTER_API_SECRET_KEY,
  access_token_key: process.env.TWITTER_ACCESS_TOKEN,
  access_token_secret: process.env.TWITTER_ACCESS_TOKEN_SECRET,
});

export default async (req, res) => {
  await client
    .post("statuses/update", {
      status: `${req.body.data.tweetText} https://dominguezdev.com/blog/${req.body.data.slug}`,
    })
    .then((result) => {
      console.log('You successfully tweeted this : "' + result.text + '"');
    })
    .catch(console.error);
  res.status(200).json({ msg: "Automation FTW, dude." });
};
The eventual request that will be sent by GraphCMS to our app will come stored inside an object called data. We can then access different properties from this data object -- for my tweets, I use two fields I created in GraphCMS: tweetText and slug. The tweetText is a text field that's limited to 140 characters and makes up the 'body' of the tweet; the slug is the ending of the url that links back to my blog. Within the blog's metadata, there are og and twitter tags to render cards for the tweets.
The last piece of the puzzle is creating the webhook in GraphCMS. From GraphCMS, on the left-hand side-nav, choose the webhook icon; when the page loads, select "create" in the top-right corner. Paste your webhook url (something like, https://www.mygreatsite.com/api/tweetGenerator) into the URL field. There's a number of options you can customize within this form.
Finally, for security, consider using a secret key or a key-value pair in the headers so people don't hijack your endpoint 🤓 You can then check these values in your api route.
Results
At this point, you should have a shameless-self-promotion workflow tweeting about your new content!


